
How to Read Knitting Charts - A Quick Guide
When I started knitting, I was using only written directions and knitting charts totally scared me away. A few years forward and now I can’t imagine not using charts at all! I’m a visual person, so I love having this visual of how the fabric should look like and everything laid out in a graphic form that’s easy to follow at a glance. In this post, I'll share some knitting chart basics for beginners, so you can start knitting from a chart easier!
This post may contain affiliate links that support the content on this blog.
PIN IT NOW & READ IT LATER!
Knitting Charts Basics
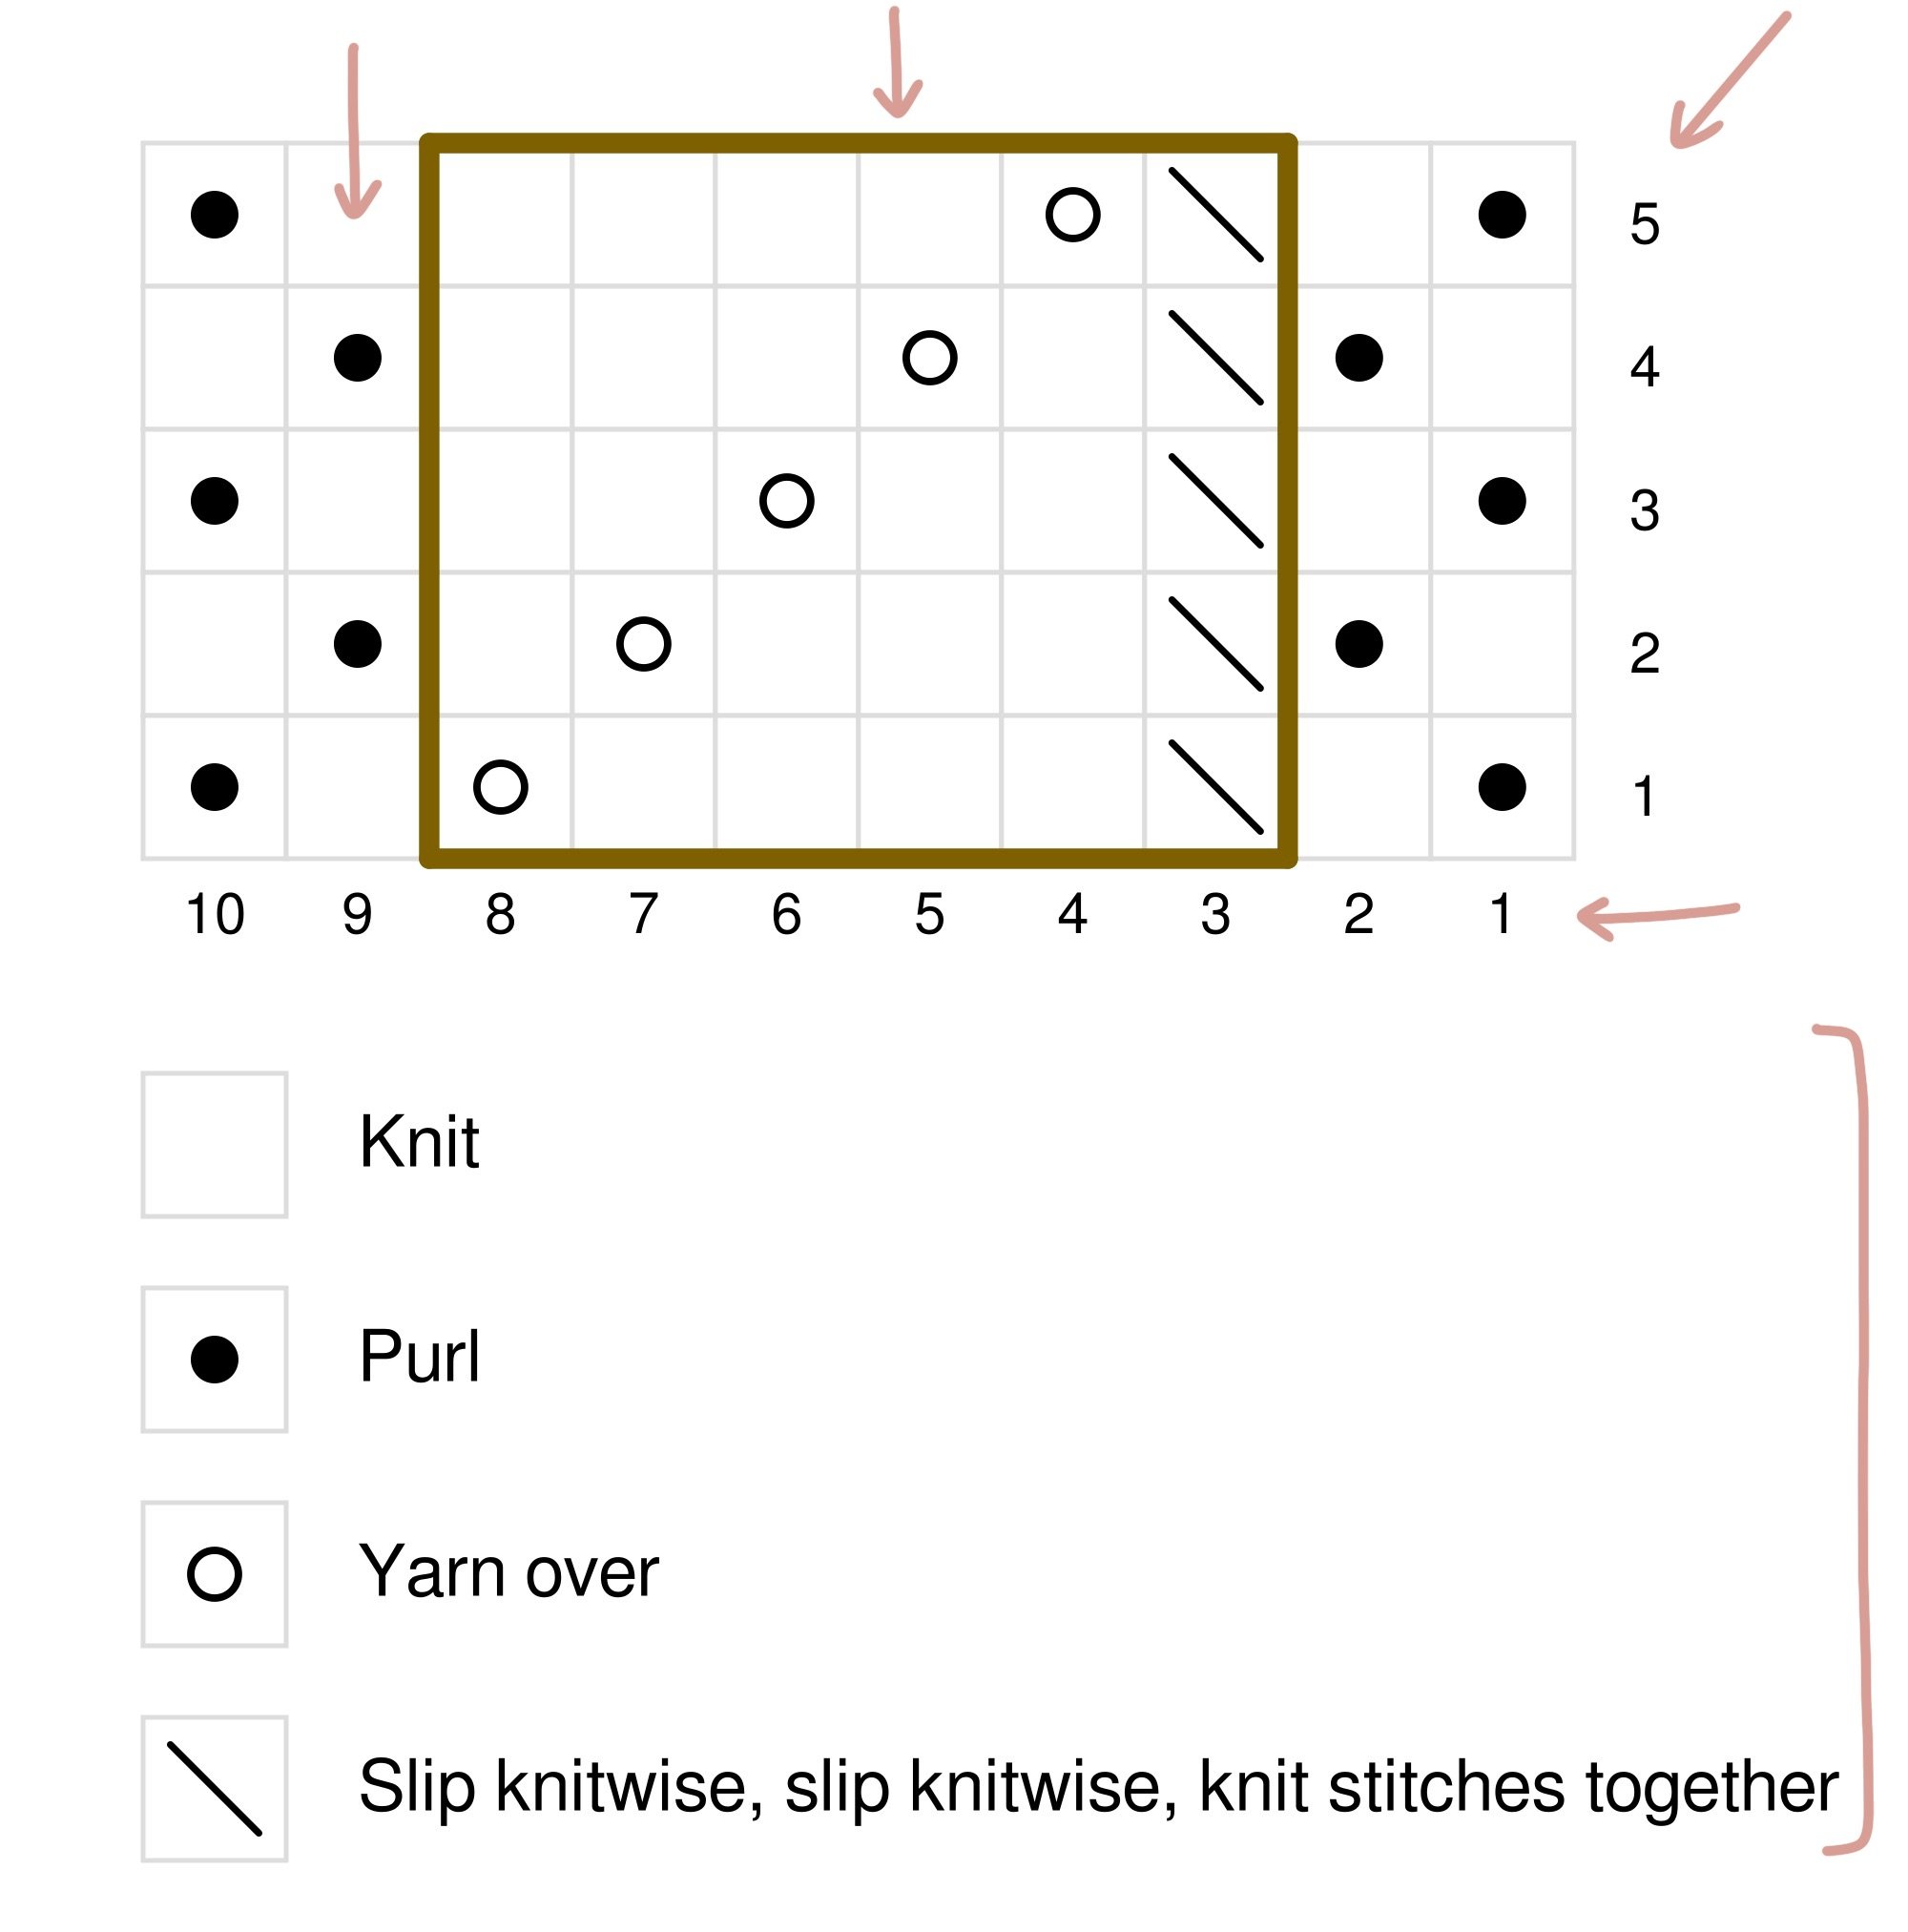
A chart is basically a visual representation of the finished knit on the right side, and it’s a grid where each box represents one stitch. A box is filled with a symbol that is an indication of what stitch has to be worked.
All symbols should be explained in a key that is included beside or below the chart (there’s not one standardized symbol system, so you may stumble upon some knitting charts where the same symbol is used to represent a different kind of stitch, so always reference the key accompanying the chart!).
There are numbers included on the chart - the numbers on the vertical axis represent rows, and numbers on the horizontal axis - stitches.
You should read the chart from the bottom up, and in the majority of the cases, you’ll start with the bottom right corner - usually, row numbers are placed on the side from which you start working, so it’s really helpful.
You can also find a part of the chart within colored, thicker lines - it’s a notification that this part of the pattern is a repeat - just like a part of written instructions between asterisks or brackets.
knitting flat from the chart
The rule of reading charts in flat knitting is that on the right side, you’ll read it from right to left side and on the wrong side, in the opposite direction - from left to right.
While many charts will have right-side row numbers on the right side of the chart and wrong-side rows - on the left of the chart, some charts can show only right-side rows and have only every other number shown on the right. It’s common if the wrong side rows are purled or worked as stitches appear - there should be a separate note present.
As the vast majority of charts represent how the finished knit’s right side looks, it means that there may be some symbols with different instructions on how to work them on the right and wrong sides.

knitting in the round from the chart
When working in the round, the chart is read only from right to left - exactly as you work! Once you finish a row, go up a row and start from the right side again. The row numbers will all be placed on the right side of the chart.

“no stitch”
No-stitch is usually represented by a grey box and it’s skipped while knitting (it doesn’t represent a stitch). It’s used to balance the amount of boxes, to keep the rectangular shape of the chart. It appears if the amount of stitches changes between rows - often in lace knitting charts or in shawl charts (with increases/decreases shaping the shawl).

Cable Charts Basics
I’m especially fond of using charts for cable knitting. Chart symbols show the direction of the cable, the background stitch and make it really easy to check if your knit follows the pattern correctly.

The cable symbol takes more than one box - it spans over as many boxes as the amount of stitches it’s worked over. While you’ll find the cable directions in the key, there are 3 pieces of information you can find in the symbol itself:

Section 1, marked in pink, between the diagonal lines, shows which direction the cable is slanting and how the visible cable part looks (while most cables are worked in stockinette, marked in blank white, however there may be cable variations using other stitches and have a mark in this part).
Section 2, marked in brown, above the diagonal line, shows how the stitches behind are worked during the cross (again, most popular is stockinette, but you may encounter variations).
Section 3, marked in green, below the diagonal line, show how the stitches were worked in the previous row.
I hope that now it’ll be easier for you to understand knitting charts!
MORE RESOURCES YOU MIGHT FIND HELPFUL:


