
How to Cast On in Knitting for Beginners - 3 Simple Methods
If you want to learn knitting, you’ll first want to know how to cast on! Casting on is the first step in any knitting project. It’s a technique of creating the first stitches on your knitting needle. When you’re just starting, casting on may seem a little daunting - but with a clear tutorial and a bit of practice, you’ll be ready to go and create your first project!
Let’s get started!
This post may contain affiliate links that support the content on this blog.
PIN IT NOW & READ IT LATER!

So, in this tutorial, I’ll show you how to cast on step by step with 3 beginner-friendly methods: Backwards Loop Cast On, Long Tail Cast On, and Knitted Cast On. I’ll also share some tips with you to make casting on easier! Get a cup of tea, ready your yarn and needles, and let’s start!
What is a cast on?
Casting on is a knitting technique of creating the first stitches on the needle - in other words - it’s a method of starting a project! There are lots of different cast on techniques that create a different type of edge or are used for specific purposes. They also differ in elasticity - some are very stretchy, while others keep your project firm.
Cast On Types
We can broadly divide cast ons into two categories:
short tail cast ons
Also called one-strand cast ons, they are worked with one strand of yarn. These cast ons can be used to start a project and cast on additional stitches in the middle of a project - for example, to add underarm stitches in a sweater.
long tail cast ons
Also called two strand cast ons, they are worked with two strands of yarn: a working yarn strand (the strand coming out of a yarn skein) and a yarn tail (the end of the yarn). These cast ons require measuring the necessary length of the yarn for a cast on before getting started.
Common Cast Ons for Beginners
The three most common cast ons learned by beginners are:
Backwards Loop Cast On - a one-strand cast on,
Long Tail Cast On - a two-strand cast on,
Knitted Cast On - a one-strand cast on.
These three cast on techniques will be covered in this tutorial, and I recommend giving each one of these a try and see which one you like best! The long tail cast on is an excellent and versatile option for a knitting beginner.
backwards loop cast on
The Backwards Loop Cast On is probably the most straightforward cast on out there - it’s creating loops on the needle! It’s most commonly used for casting on stitches in the middle of a project - for example, stitches for the underarm or neckline of a sweater.
It doesn’t create the neatest edge, and the first row of stitches can be a little more fiddly to work. Still, you can also use it for starting your first knitting projects (that was my go-to method for many of my beginner projects!). It’s most commonly used by absolute beginners due to its super simplicity and by seasoned knitters for edges that will be used to pick up stitches from later on.
long tail cast on
Long Tail Cast On creates a neat, strong, slightly elastic edge. It’s a great cast on for lots of projects that require a bit of stretch. On the downside, it’s not the most stretchy cast on, so it may not work best in projects that require a lot of stretch (for example, socks).
It’s a two-strand cast on, so you’ll need to measure the necessary length of yarn for the cast on before starting - there is no way to prolong the tail if you run out of the strand to cast on the next stitches - you will need to unravel and start over. No worries, I’ll share my tips on measuring the yarn strand for cast on later in this tutorial!
knitted cast on
The Knitted Cast On creates a slightly stretchy edge. It’s worked with just one strand (no measuring the yarn tail!) and is similar to the technique of knitting a stitch. Unlike the previous two cast ons, the knitted cast on is worked with two needles.
Tools for Learning How to Cast On
You don’t need many tools and supplies to start learning how to cast on - just two: yarn and knitting needles.
Yarn. I recommend getting yarn in a light color, in worsted weight (category medium). Go for fiber with a bit of stretch so it’s easier to work with - wool or acrylic. Stick to smooth yarns - nothing fuzzy or loopy so you can see your stitches clearly.
Knitting needles. Choose needles in size corresponding to your yarn weight - recommended needle size is almost always listed on the yarn label. These can be any needles - circular or straight.
YARN ENDS EXPLAINED
Before we move to the tutorials, let’s talk about the yarn ends. This will help you follow this tutorial and other beginner tutorials easier.
We’ll often refer to two yarn parts - the working yarn (also called ball yarn) and the yarn tail. Pull up a bit of yarn and place it on a table. The end of the yarn that leads to the ball is called the “working yarn” or “ball yarn”, and the actual end of the yarn strand is called the “tail end”.
Backwards Loop Cast On Step by Step Tutorial
The first cast on technique I’ll show you in detail is the Backwards Loop Cast On.
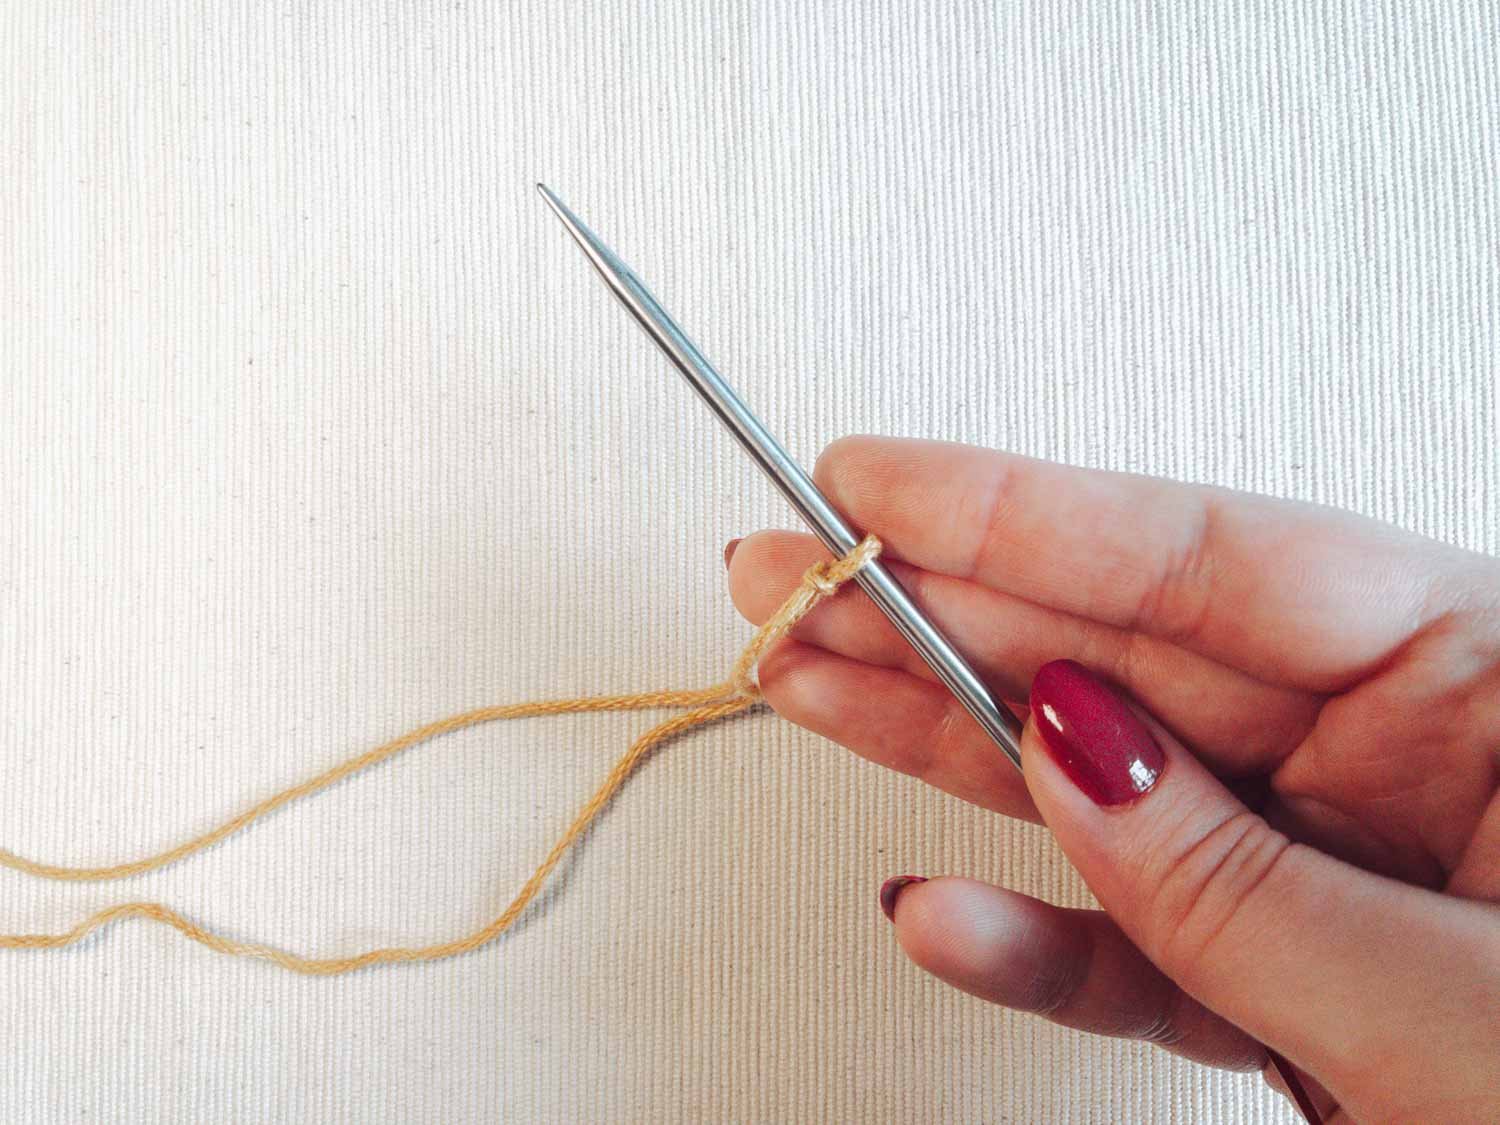
1. Make a slip knot and place it on the needle
When making a slip knot, leave at least 15 cm (6”) long yarn tail to weave in later. If you’re right-handed, keep the needle in your right hand and the yarn in your left yarn.
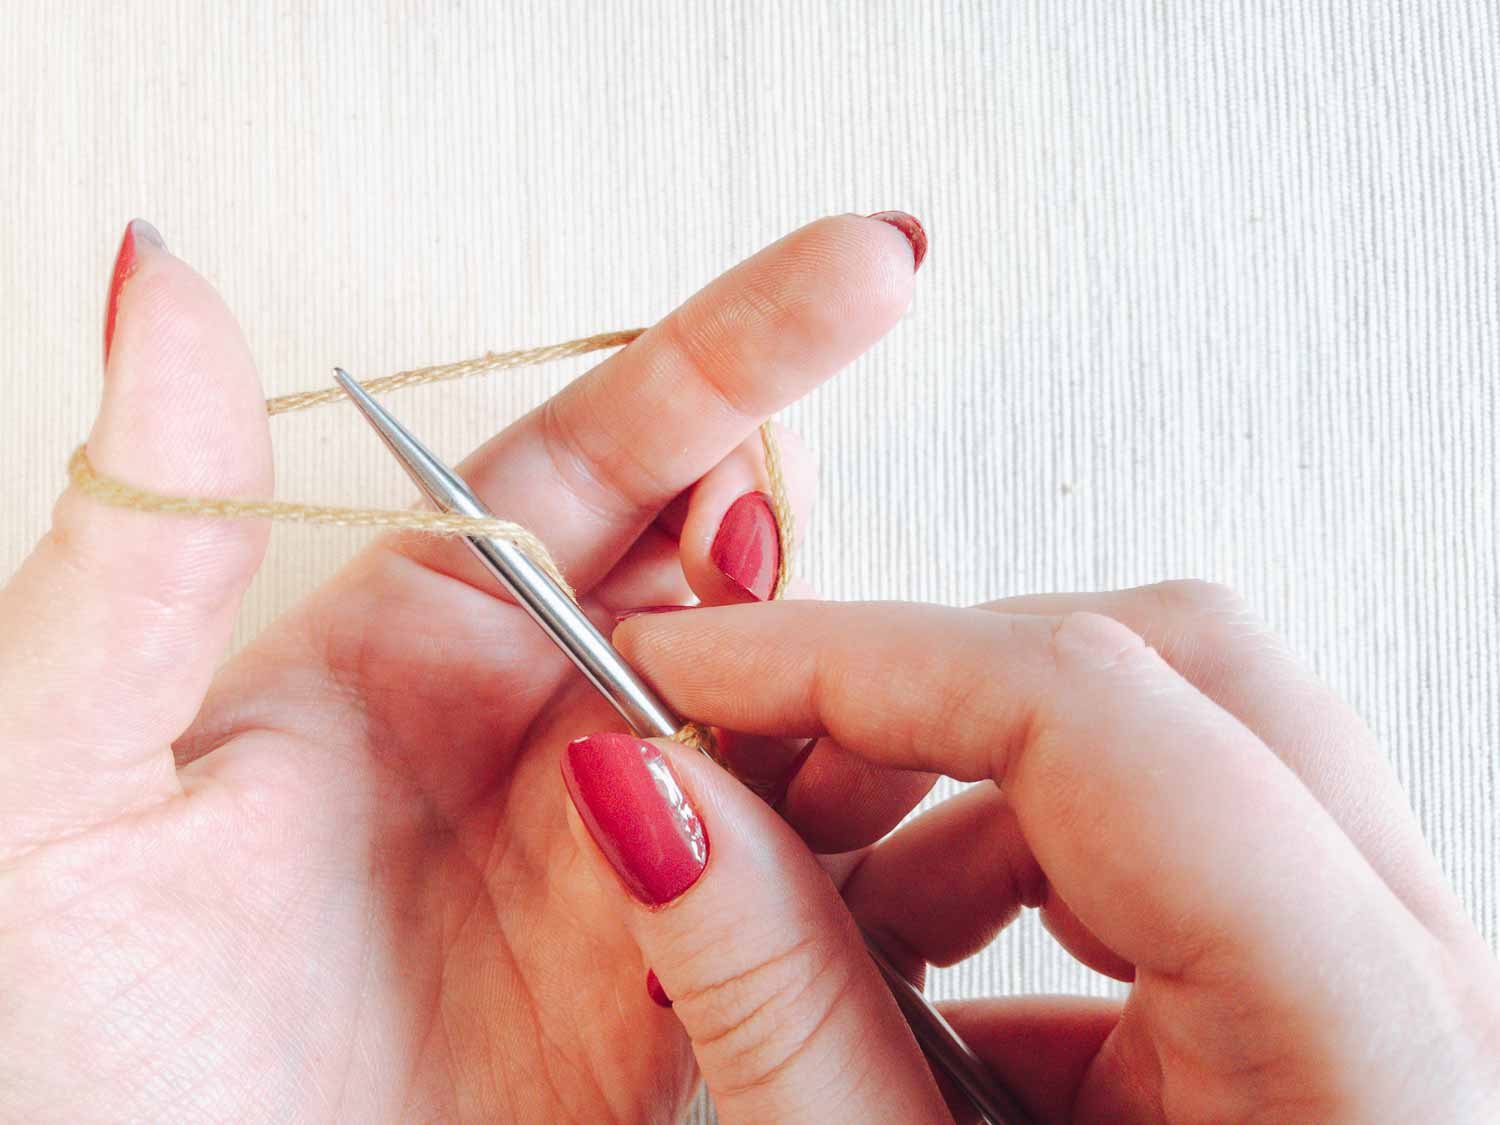
2. Hold the yarn
Wrap the working yarn around your thumb and index finger.

3. Move the needle under the thumb strand
4. Move the needle up
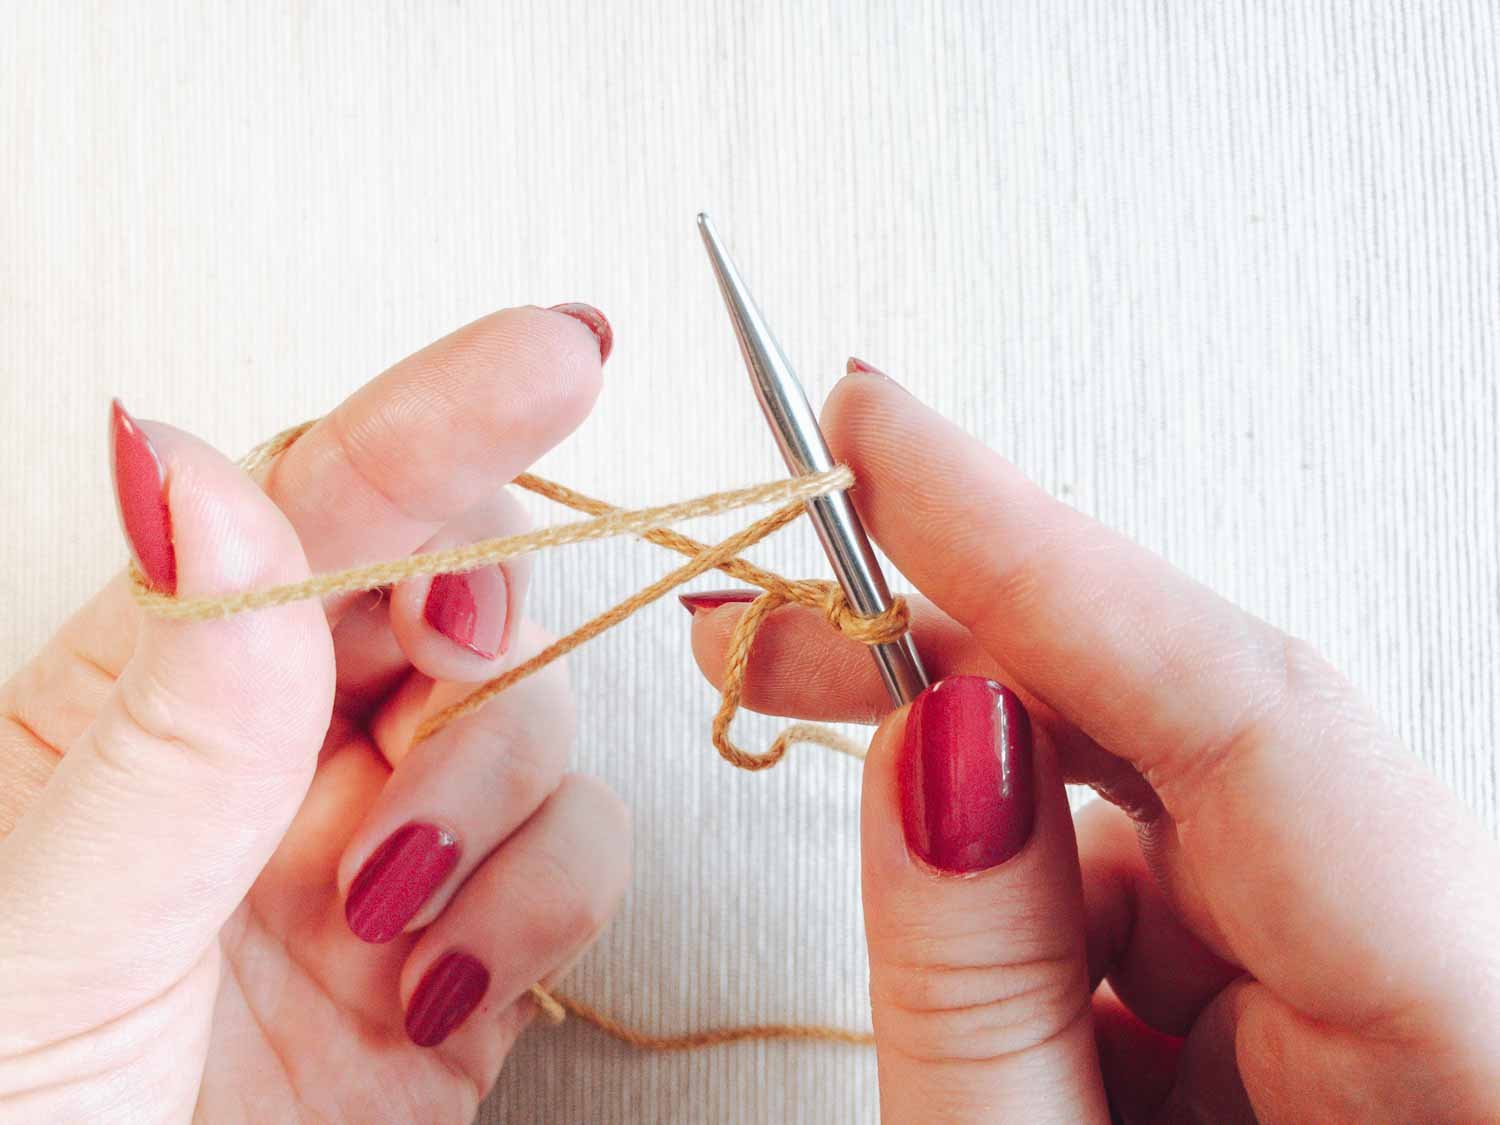
5. Release the working yarn from your fingers
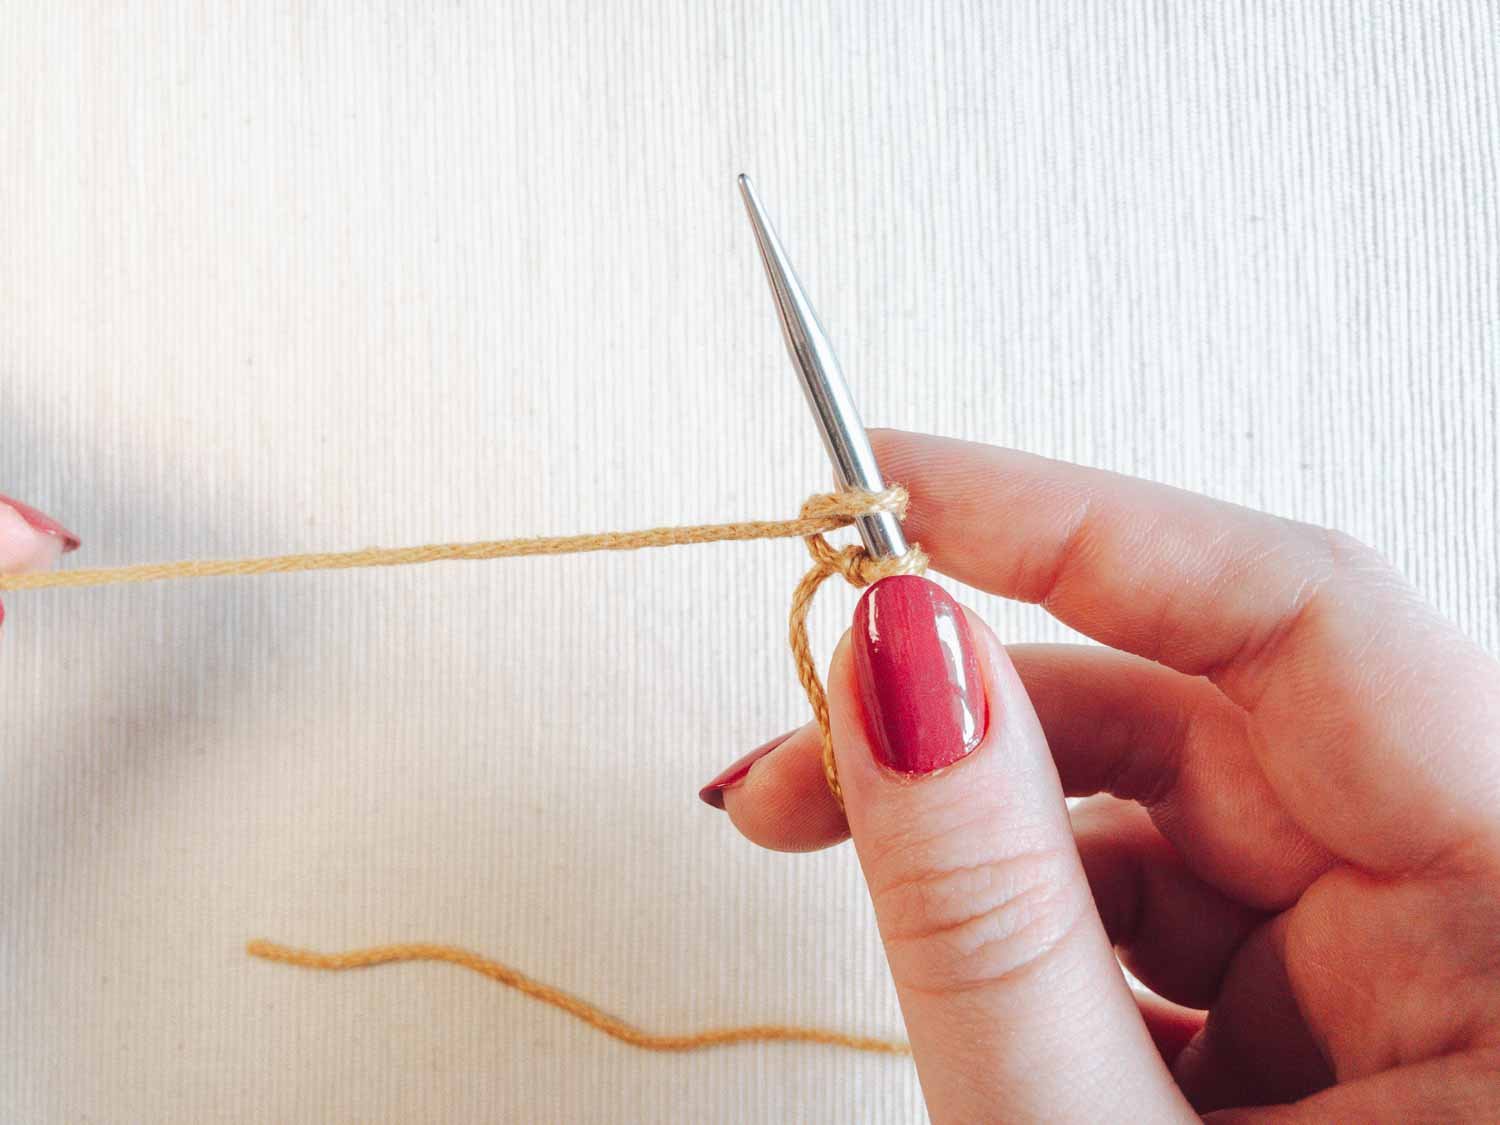
6. Tighten the loop
You just cast on your stitch! You should have two loops on your needle: the slip knot and the newly cast on stitch. To cast on the next stitches, repeat steps 2-6 until you cast on as many stitches as you need. Remember that the slip knot counts as the first stitch.
Long Tail Cast On Step-by-Step Tutorial
Let’s have a look at how to cast on stitches with the Long Tail Cast On method.
1. Measure the yarn tail
To measure the yarn tail needed to cast on all of your stitches, simply wrap the yarn around the needle as many times as the stitches you want to cast on. Then pinch your yarn and unravel the loops - this is approximately the length you’ll need to cast on the stitches. Add another 15 cm (6 in) to have enough tail to weave in later.
If you need to cast on many stitches, my tip is to wrap the yarn around the needle 10 times and then measure this length for every 10 stitches you need to cast on.
2. Make a slip knot and place it on the needle
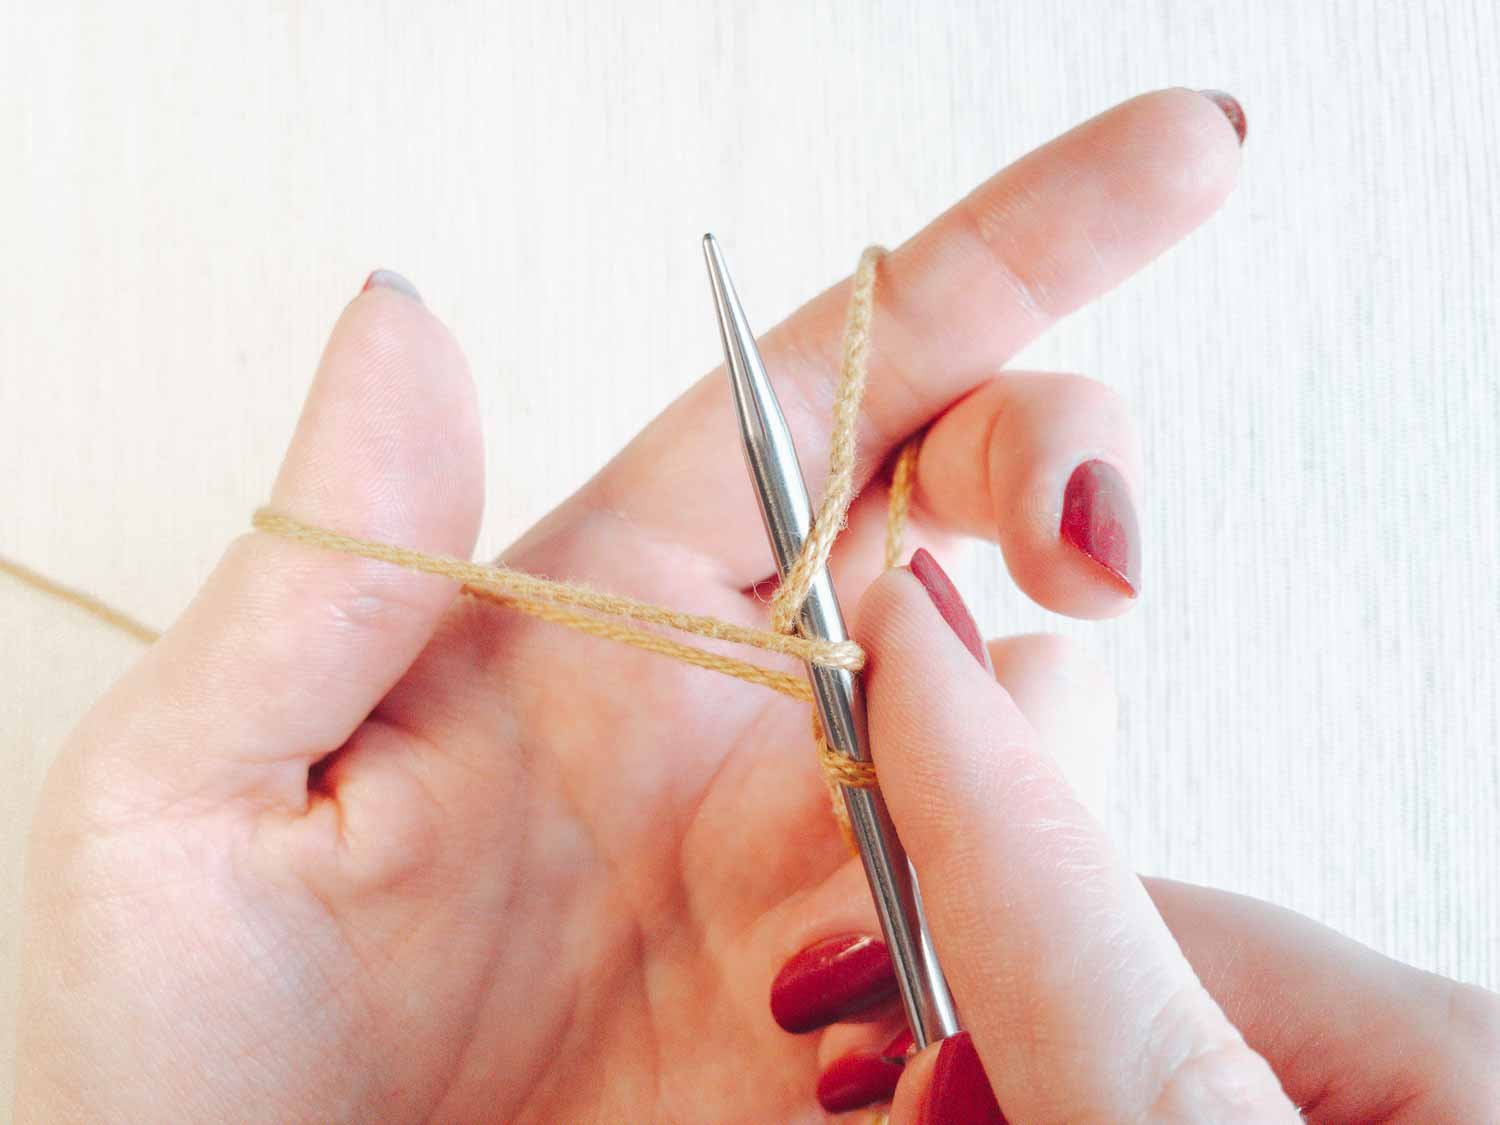
3. Hold the yarn as in slingshot
If you’re right-handed, keep the needle in your right hand and the yarn in your left yarn. To hold the yarn for this cast on, insert your thumb and index finger between the working yarn and the yarn tail, then bring your needle down a bit to form a kind of slingshot shape with the yarn strands.

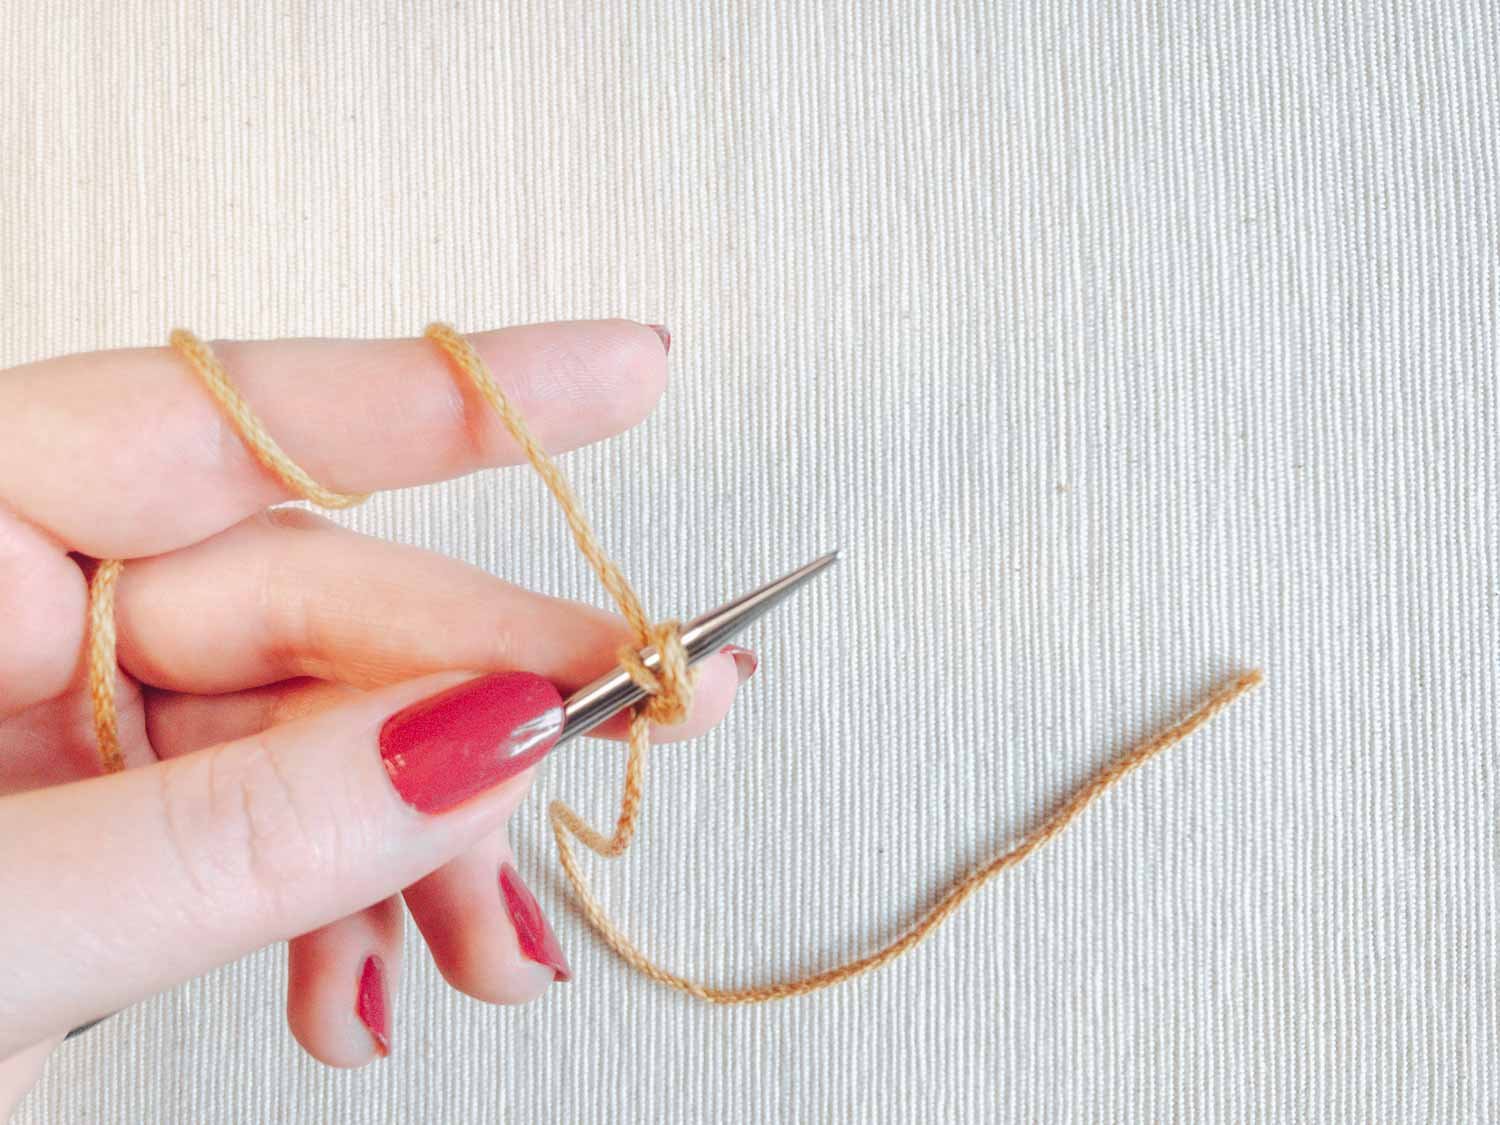
4. Move the needle under the thumb loop and up

5. Move the needle through the index finger loop down
6. Move the needle down through the thumb loop

7. Slip the yarn off the thumb and tighten the loop on the needle
You just cast on your stitch! You should have two loops on your needle: the slip knot and the newly cast on stitch. To cast on the next stitches, repeat steps 3-7 until you cast on as many as you need. Remember that the slip knot counts as the first stitch.

Knitted Cast On Step-by-Step Tutorial
The last technique we’ll look at is the Knitted Cast On. This cast on is very similar to working the knit stitch - so if you already know how to do the knit stitch, it should be easy to learn!
1. Make a slip knot and place it on the needle.
When making a slip knot, leave at least 15 cm (6”) long yarn tail to weave in later.
2. Hold the yarn
If you’re right-handed, keep the needle with the slip knot in your left hand and an empty needle in your right hand. Wrap the working yarn around your left-hand fingers to maintain tension.

3. Make the first knit stitch
Insert the needle into the slip knot from left to right - as if to knit.

Move the right-hand needle under the working yarn so the strand wraps around the right-hand needle counterclockwise.

Use the right-hand needle tip to pull the yarn through the slip knot.

4. Place the stitch on the left needle
Place the new stitch on the left needle, simply slipping it from the right to the left needle.
You just cast on your stitch! You should have two loops on your needle: the slip knot and the newly cast on stitch. To cast on the next stitches, repeat steps 3-4 until you cast on as many as you need. Remember that the slip knot counts as the first stitch.
Starting the First Row of Knitting
After you finish your cast on, you’re ready to start working on your project!
To work the first row when you cast on with Backwards Loop Cast On or Long Tail Cast On, turn your work so that the needle tip points right and the working yarn is on the right side of your stitches. If you’re right-handed, hold the needle with the cast on in your left hand, and the empty needle in your right hand.
If you cast on with Knitted Cast On - you don’t need to turn your needle - your stitches and working yarn are already in the correct position to start working the first row!
Tips for Casting On
Remember that the slip knot loop counts as a stitch when counting your stitches.
Don’t cast on your stitches too tight. Tight stitches are tough to work in the next row! If you have trouble casting on too tightly, try using a larger needle size for the cast on. You can also try to cast on the stitches using two needles held together, then remove one needle - your stitches will be bigger and easier to work into!
To avoid too tight stitches, make sure you cast on the stitches on the body part of the needle, not just the tapered tip.
The stitches shouldn’t be too loose either - if your cast on stitches are very loose and uneven, try casting on with a smaller needle.
To speed up counting your cast on stitches, count them by groups of two or more.
When using a Long Tail Cast On or a Knitted Cast On, think about starting working your project on the wrong side row. These cast ons create a line of purl bumps on the back of the cast on, and they will show on the front of your work if you start working a right side row. It’s just a choice and a question of your preference. This may not bother you at all!


