
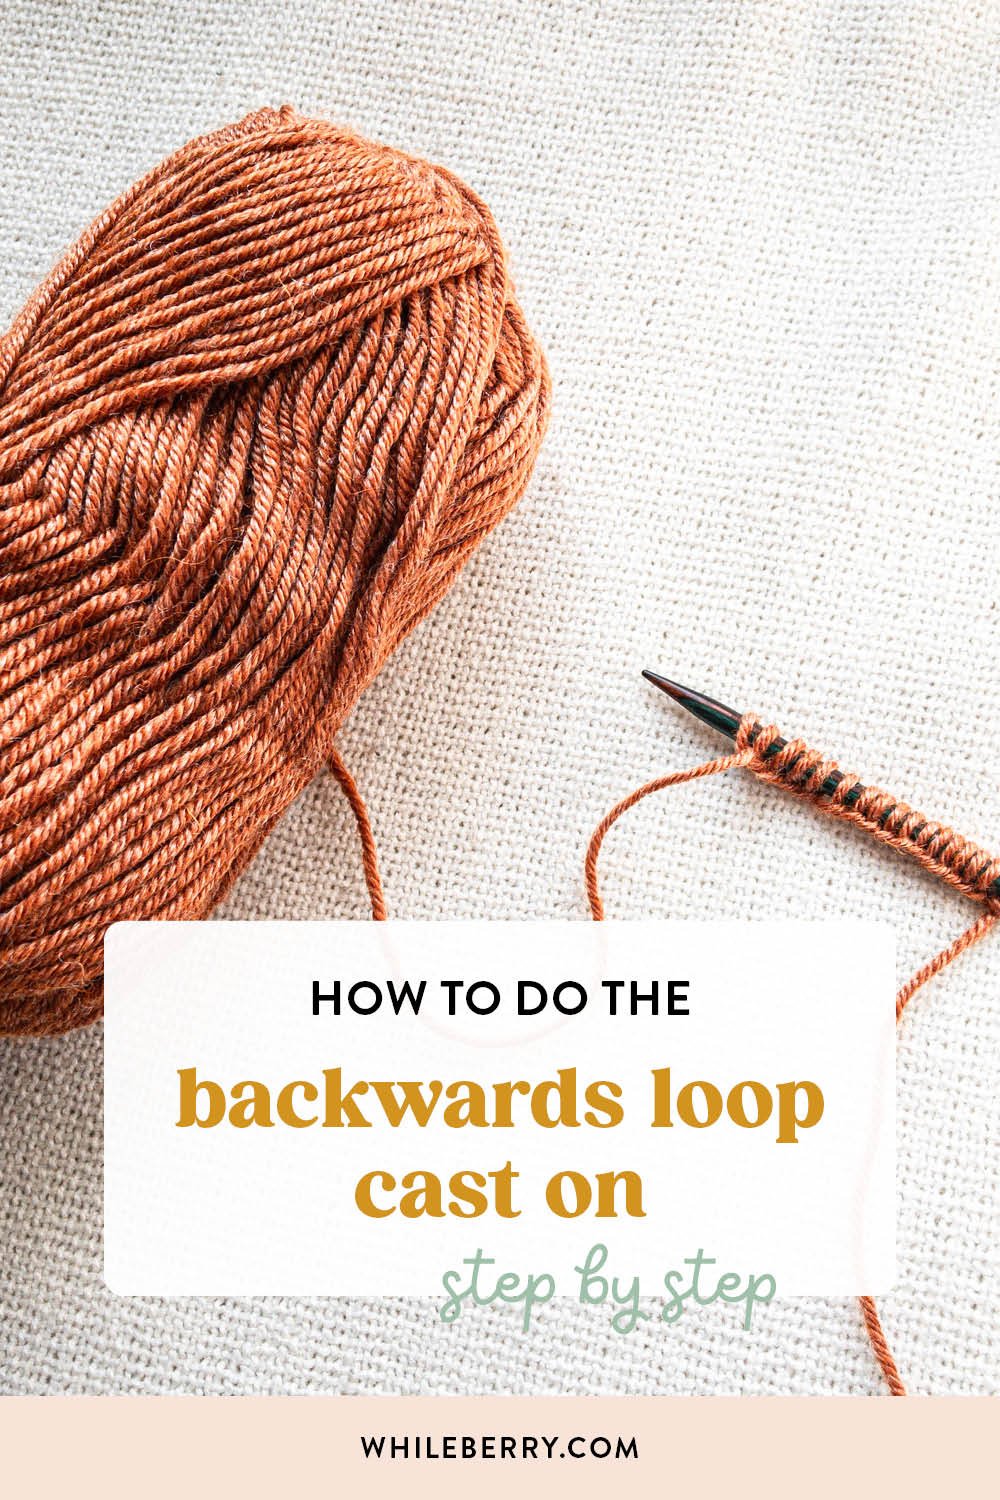
How to Do the Backwards Loop Cast On in Knitting
The Backwards Loop Cast On is one of the easiest cast on methods in the knitting world. In fact, it’s the first technique I learned as a knitting beginner! In this post, you’ll learn all you need to know about the Backwards Loop Cast On: the materials needed to learn it, step-by-step instructions, and a few tips to make this cast on easier for you!
Let’s get into it!
This post may contain affiliate links that support the content on this blog.
PIN IT NOW & READ IT LATER!
About the Backwards Loop Cast On
The Backwards Loop Cast On is probably the most straightforward cast on out there - it’s basically creating loops on the needle! It’s used mostly for casting on stitches in the middle of a project, for edges that will be later used to pick up stitches from, like stitches for an underarm or a neckline of a sweater.
It can also be used to start a new project by a beginner too - in fact, it’s most commonly used by absolute beginners due to its super simplicity.
The downside of it is not the neatest edge out there, and the first row may be a little fiddly to work.
Supplies for Learning the Backwards Loop Cast On
To learn this cast on, all you’ll need is yarn and knitting needles.
Yarn. I recommend getting light-colored yarn in worsted weight (category medium). Choose yarn with a bit of stretch so it’s easier to work with - wool or acrylic. Try to find smooth yarn without any fuzziness so it’s easy for you to see the stitches well.
Knitting needles. Choose needles size matching your yarn weight - recommended needle size should be listed on the yarn label. You can use any type of knitting needles for this tutorial - circular or straight.
Knitting Term to Know for Cast On Tutorial
In this tutorial we’ll refer to two yarn parts - the working yarn and the yarn tail. If you pull up a length of yarn and place it on a table, you’ll see two “parts” of the strand. The end of the yarn that leads to the ball is called the “working yarn”, and the actual end of the yarn strand is called the “tail end”.
Backwards Loop Cast On Step by Step Tutorial
The first cast on technique I’ll show you in detail is the Backwards Loop Cast On.
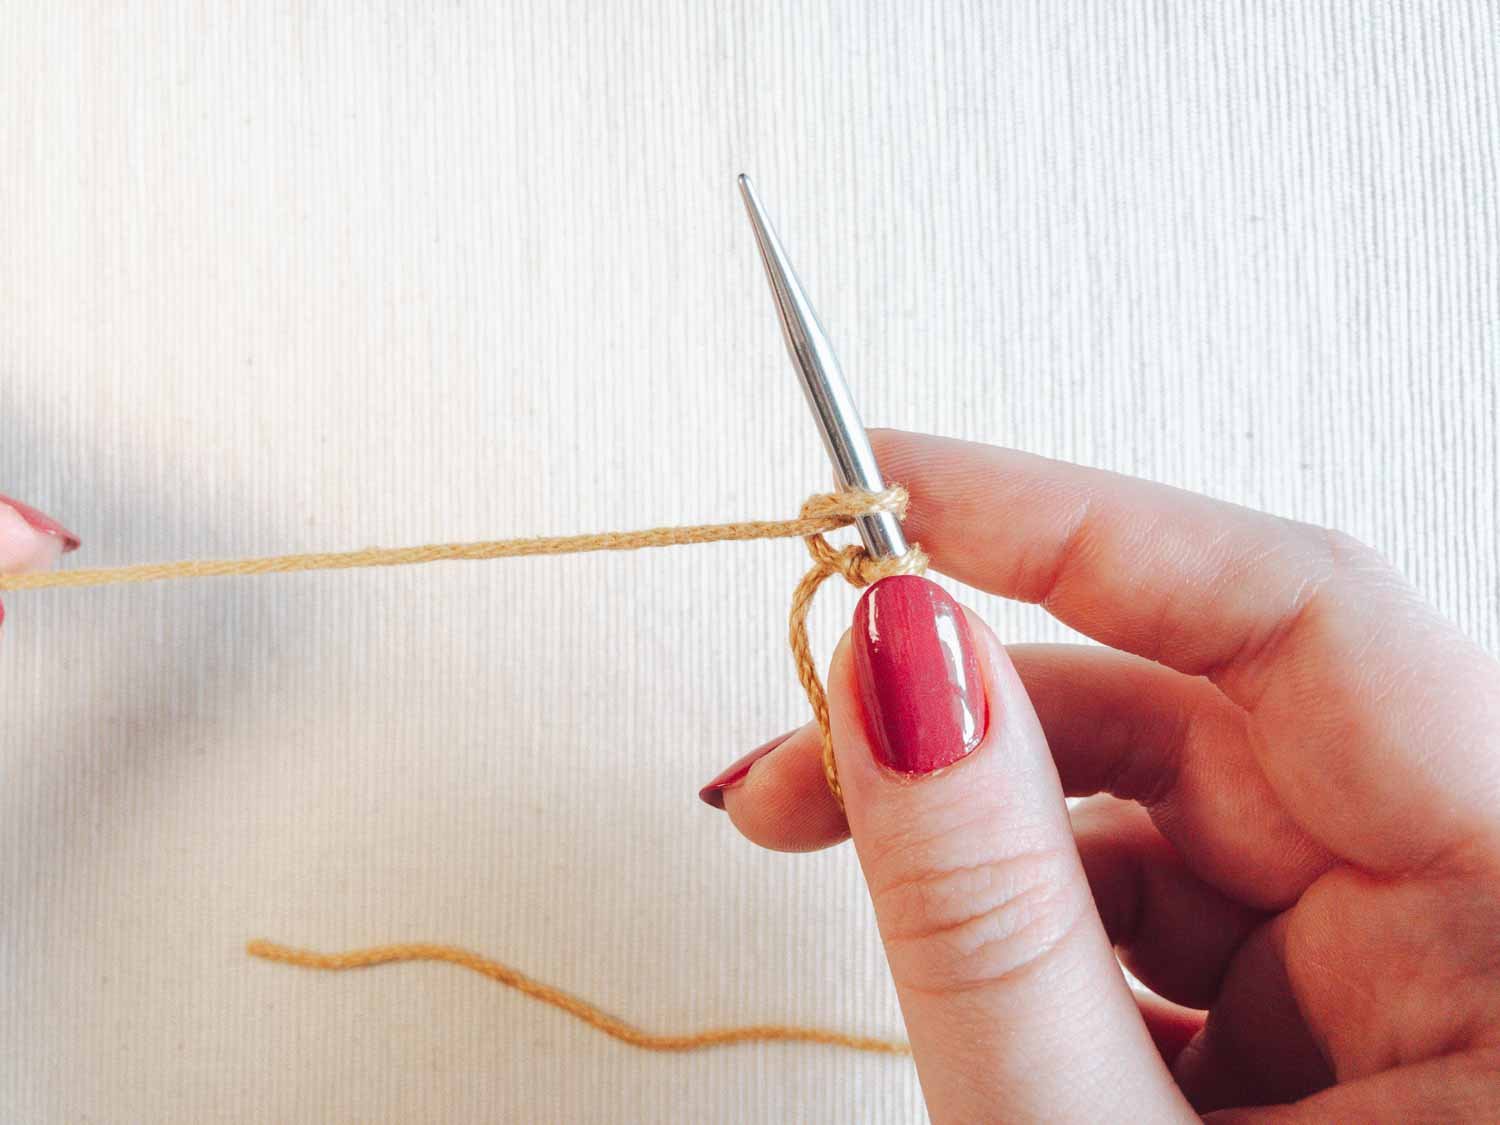
1. Make a slip knot and place it on the needle
When making a slip knot, leave at least 15 cm (6”) long yarn tail to weave in later. If you’re right-handed, keep the needle in your right hand and the yarn in your left yarn.
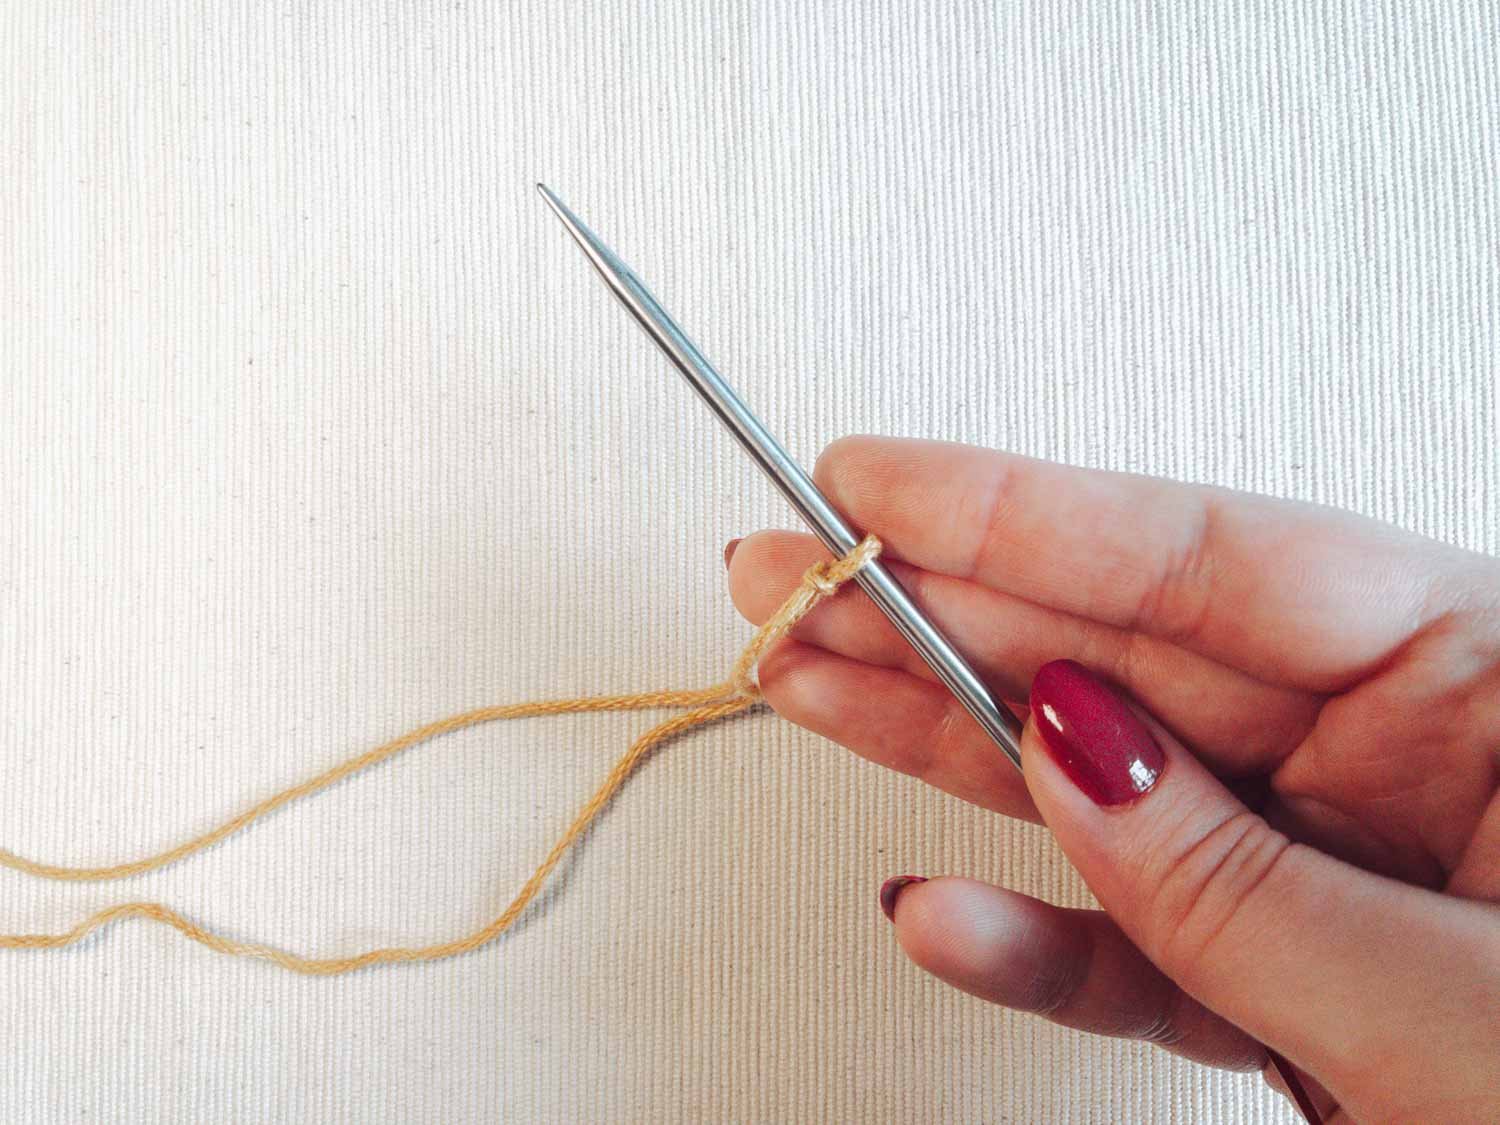
2. Hold the yarn
Wrap the working yarn around your thumb and index finger.

3. Move the needle under the thumb strand
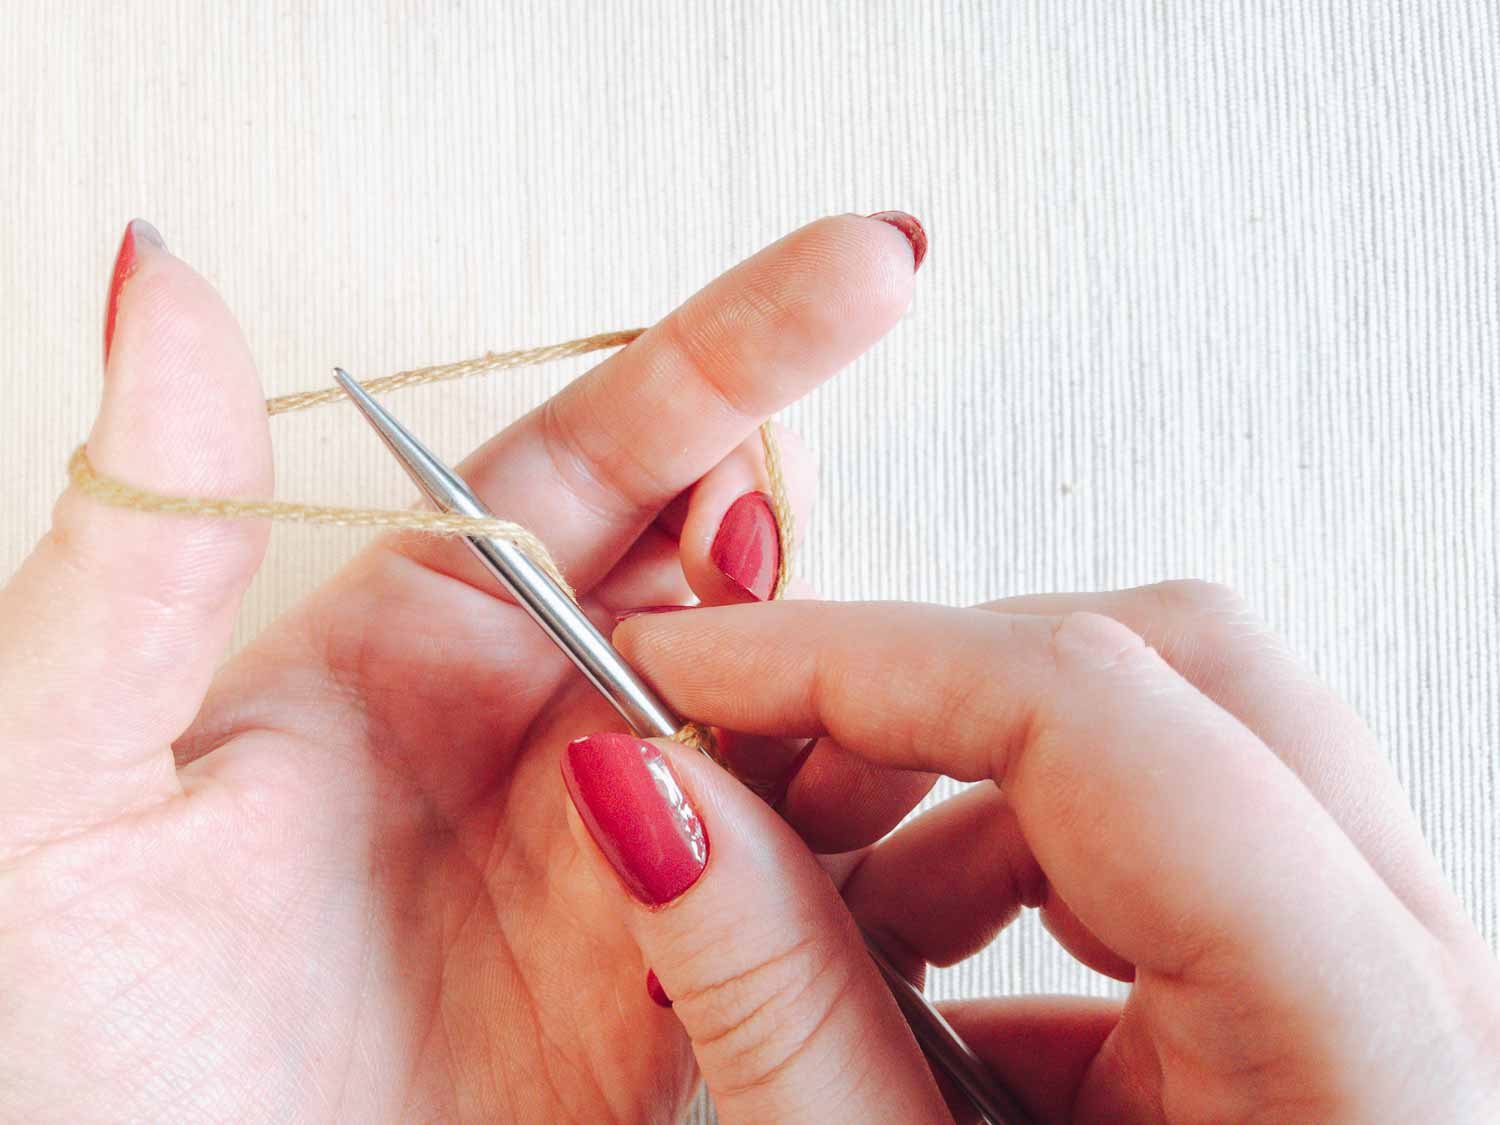
4. Move the needle up
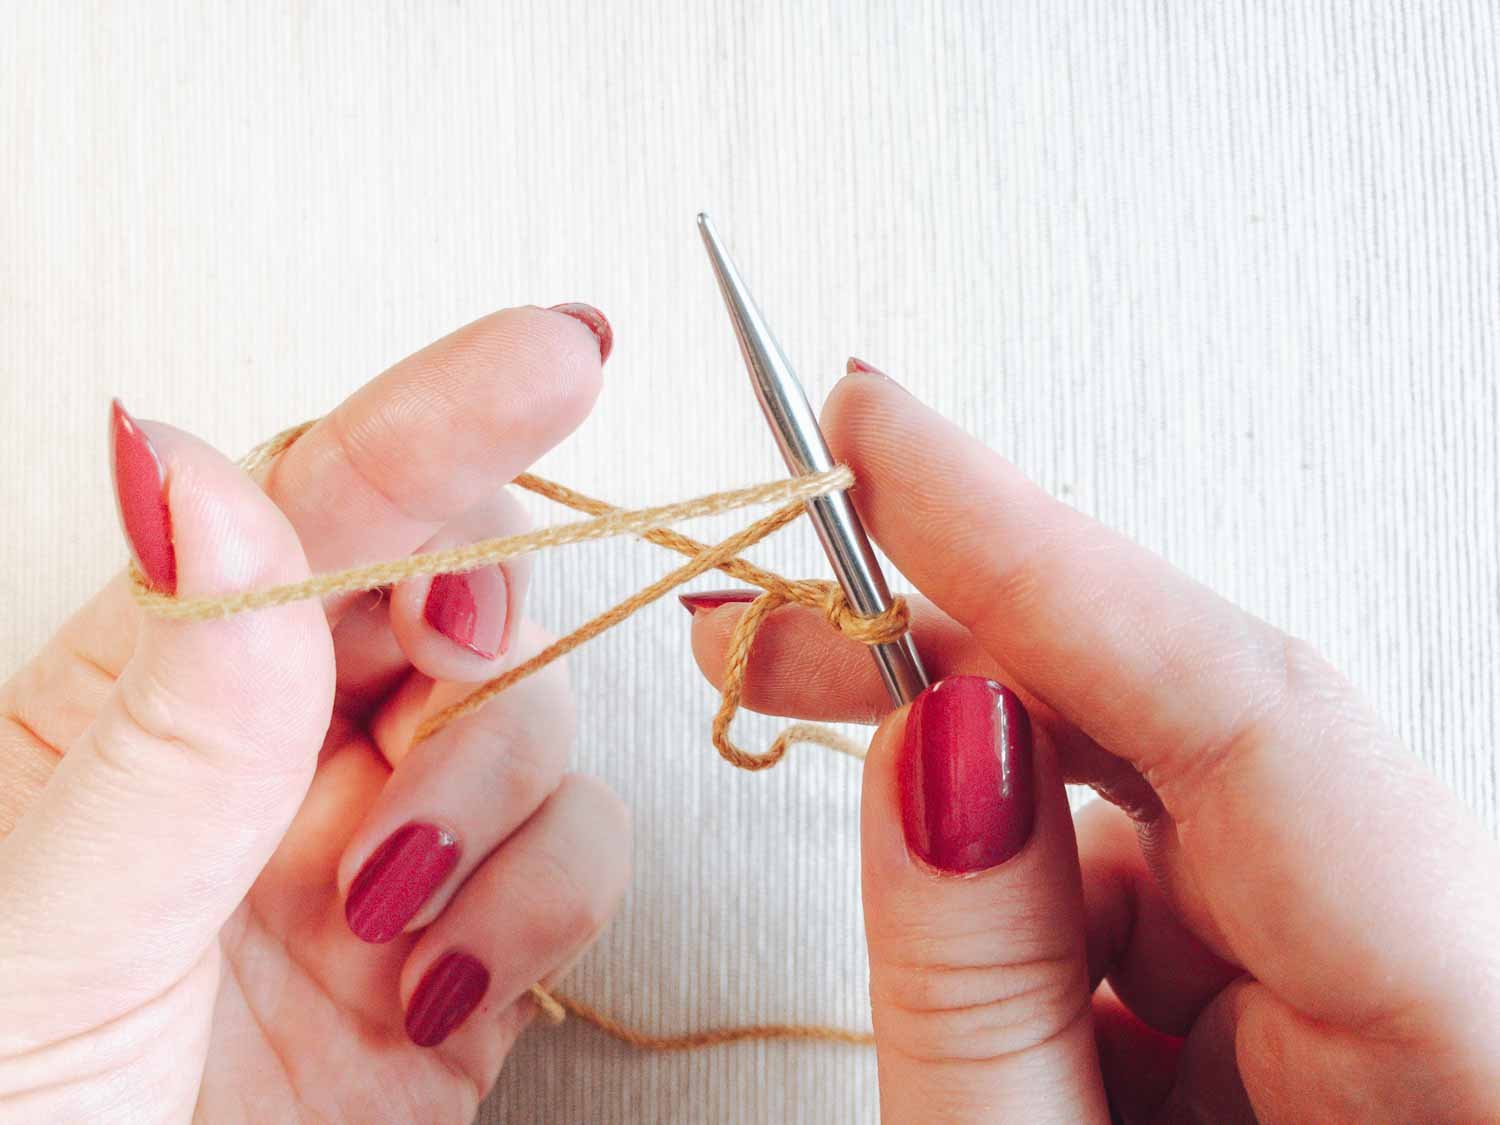
5. Release the working yarn from your fingers
6. Tighten the loop
You just cast on your stitch! You should have two loops on your needle: the slip knot and the newly cast on stitch. To cast on the next stitches, repeat steps 2-6 until you cast on as many stitches as you need. Remember that the slip knot counts as the first stitch.
Starting the First Row of Knitting
After you finish your cast on, you’re ready to start working on your project! To work the first row, turn your needle so that the needle tip points right and the working yarn is on the right side of your stitches. If you’re right-handed, hold the needle with the cast on in your left hand, and the empty needle in your right hand to work the stitches.
Tips for Backwards Loop Cast On
Remember that the slip knot loop counts as a stitch when counting your stitches!
As with any cast on, don’t cast on your stitches too tight, because they will be harder to work into in the next row and may pull your knitting project in. If you have trouble casting on too tightly, try using a larger needle size for the cast on, or cast on the stitches using two needles held together, then remove one needle.
Another way of avoiding tight stitches is making sure that you cast on the stitches on the body part of the needle, not just the tapered tip.
On the other hand, don’t cast on your stitches too loosely too - if your cast on stitches are very loose and uneven, try casting on with a smaller needle.
If your yarn is untwisting while you cast on - no worries! Just let go of the strand and let it re-twist, or help to twist it a bit with your fingers.
MORE KNITTING TUTORIALS:


