
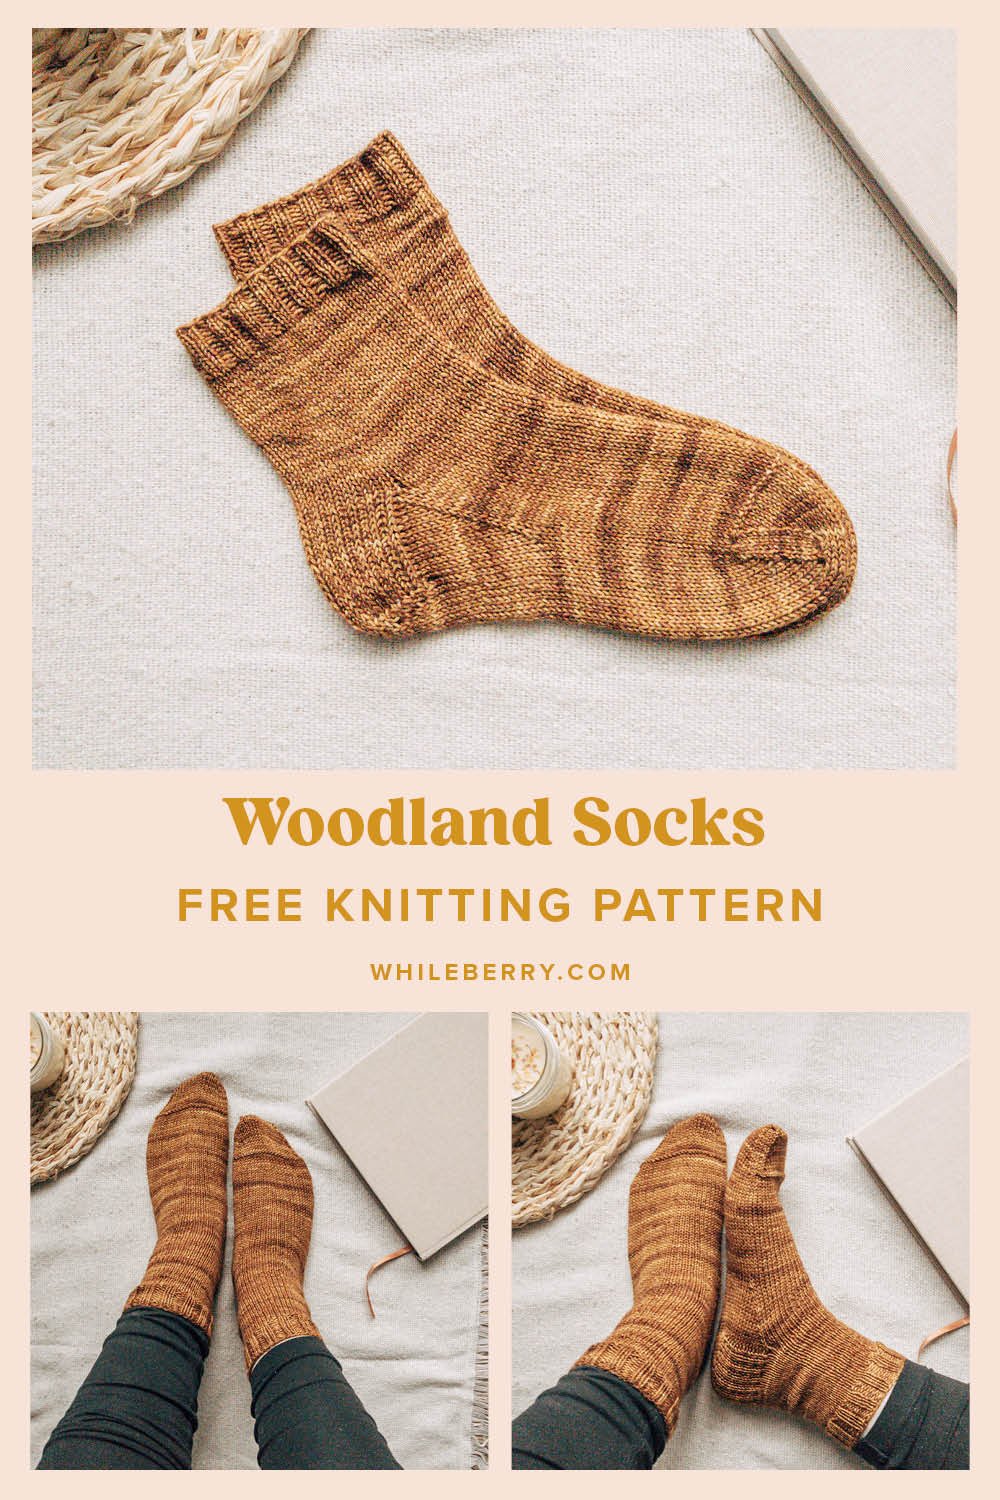
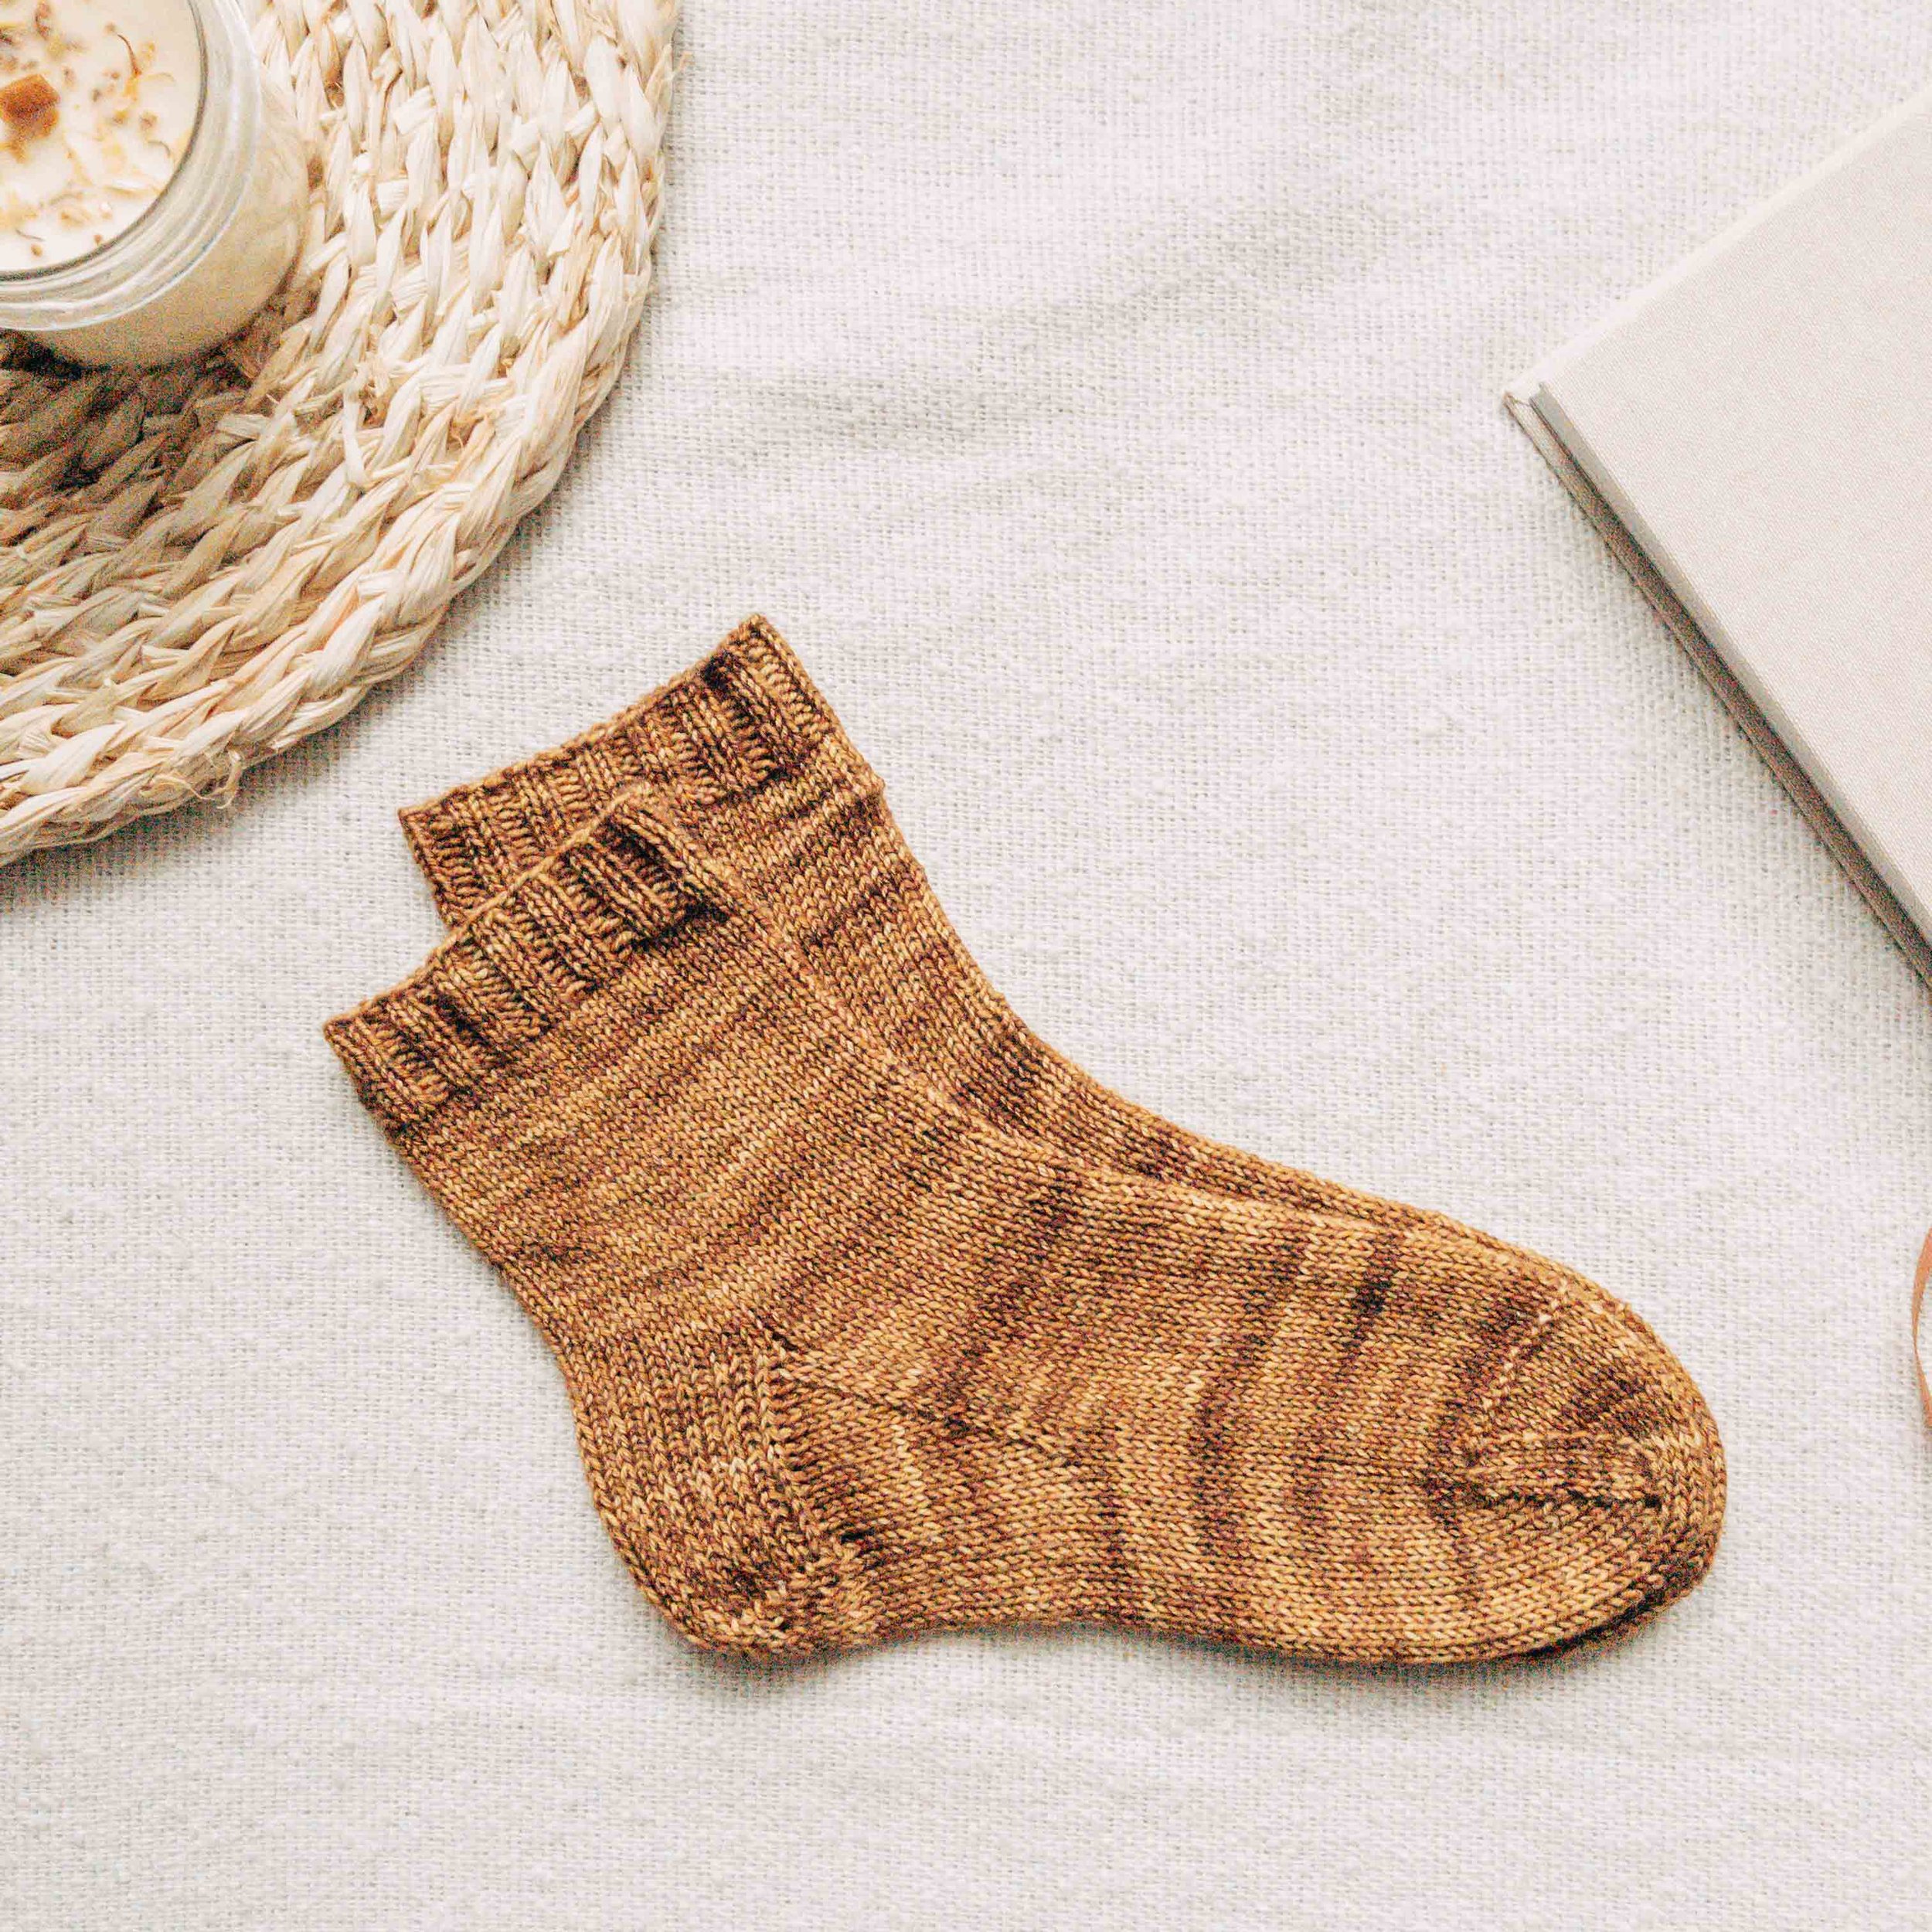
Woodland Socks Knitting Pattern
While I love knitting complex socs with cables and lace, sometimes I'm in need of a simple sock knitting pattern! Something easy, so it's perfect to knit along watching a movie or a series without peeking into a pattern or a chart every few moments! Plain vanilla socks are also great to use these special skeins of hand dyed yarn - tonals or a colorful, variegated skeins!
Are you convinced? If yes, grab a skein of fingering weight yarn and let's knit an all year round pair of socks!
This post contains affiliate links that support the content on this blog.
PIN IT NOW & MAKE IT LATER!
GET THE WOODLAND SOCKS:
Woodland Socks Free Knitting Pattern
Choose one of the three sizes listed - 1 (2, 3) and follow the directions for your size later in the instructions section. Each instruction that differs depending on the size will be listed in the exact same format - for example, k 8 (9, 10), which means: for size 1 - k8, for size 2 - k9, and size 3 - k10.
If you’ve never worked with a knitting pattern before, I recommend that you first read my blog post about knitting from a pattern.
© Whileberry 2023. Please keep in mind that this pattern is for personal use only, and both the pattern and photos can’t be copied or reproduced on another website.

Sizes
1 (2, 3). Finished sock circumference is 17.5 (20, 22.5) cm / approx. 7 (8, 9)”. Choose a size that is 1 - 2.5 cm (0.5 - 1”) smaller than your foot circumference. Foot length is adjustable - for a good fit, knit a sock approx. 1.5 cm (0.5”) shorter than your actual foot length.
Tools & Supplies
yarn
For these socks, you’ll need 240 (280, 320) m - 260 (305, 350) yds of fingering weight (category 1 - super fine) yarn. However if you plan to lengthen the leg of the sock or knit a foot longer than 25 cm (10"), you’ll likely need more yarn than this! For my pair I used a skein of hand dyed merino & nylon blend from a local yarn dyer - this pattern is great to use these special yarn skeins, also those most colorful and variegated! If you’re on the hunt for some solid yarn from widely available brands, any of those will be a great fit to use here:
needles
2.5 mm (US 1.5) circular needles 80 - 100 cm (32 - 40”), or to fit gauge
other notions
Stitch marker, tapestry needle and scissors.
Gauge
32 stitches x 44 rounds in 10x10 cm (4x4”) in stockinette stitch, blocked
Pattern Notes
This pattern has been written for the magic loop method, however, it can be worked on DPNs if preferred. In this case, instead of dividing stitches into 2 equal parts, divide them into 4 equal parts - 2 for front/instep and 2 for back/sole.
Stitch count changes and totals are noted in italic.
Tutorials for specific techniques are linked and showing as yellow.
Stitch Guide
stockinette stitch
All rnds: k all sts until end of rnd.
Abbreviations
bor - beginning of round
dec - decreased
k - knit
k2tog - knit 2 sts together (1 st dec)
NA / NB - needle A / needle B
p - purl
p2tog - purl 2 sts together
rnd(s) - round(s)
RS / WS - right side / wrong side
sl1wyib / sl1wyif - slip 1 st purlwise with yarn in back / front
ssk - slip 1 st knitwise, slip 1 st knitwise, knit the slipped sts together through the back loop (1 st dec)
st(s) - stitch(es)
tw - turn work
** - work instruction between asterisks given number of times or until given moment
Instructions
cuff
Cast on 56 (64, 72) sts using Old Norwegian Cast On. Divide sts evenly between two needles, join to work in the round and place a beginning of round marker. The first half of the stitches will be referred to as NA (these will be your front / instep stitches) and the second half will be referred to as NB (these will be your back / sole stitches).
Work Rnd 1 a total of 12 times, or until the ribbing is 2.5 cm (1") long.
Rnd 1: *k2, p2* until end of rnd.

leg
Work Rnd 1 until the leg is 9 cm (3.5") long, excluding the ribbing. You can knit a longer leg if preferred, however it will increase the yardage.
Rnd 1: k until end of rnd.
Next, knit across NA only and move to the heel flap section.
heel flap
Heel flap will be worked in rows on NB only over 28 (32, 36) sts. Work Rows 1 - 2 once. You can remove the current bor marker.
Row 1 (RS): k2, *sl1wyib, k1* until end of row.
Row 2 (WS): sl1wyif, p until end of needle.
Next, work Rows 3-4 a total of 13 (15, 17) times.
Row 3 (RS): *sl1wyib, k1* until end of row.
Row 4 (WS): sl1wyif, p until end of needle.
28 (32, 36) rows of heel flap worked in total.
heel turn
Heel turn is worked in rows as well on NB only. Work Rows 1-2 once.
Row 1 (RS): sl1wyib, k 16 (18, 20), ssk, k1, tw. 27 (31, 35) sts.
Row 2 (WS): sl1wyif, p7, p2tog, p1, tw. 26 (30, 34) sts.
Next, work Rows 3-4 a total of 4 (5, 6) times.
Row 3 (RS): sl1wyib, k to 1 st before gap, ssk, k1, tw. 1 st dec.
Row 4 (WS): sl1wyif, p to 1 st before gap, p2tog, p1, tw. 1 st dec.
10 (12, 14) rows worked in heel turn. 18 (20, 22) sts remaining on NB.
gusset
You will resume working in the round in the gusset section. Work a set-up round once.
Set-up rnd:
NB: k 9 (10, 11), place a new bor marker, k 9 (10, 11), pick up and knit 15 (17, 19) sts along the heel flap edge,
NA: k until end of needle,
NB: pick up and knit 15 (17, 19) sts along the other heel flap edge, k until end of rnd.
48 (54, 60) sts on NB - 76 (86, 96) sts in total.
Next, work Rnds 1-2 a total of 10 (11, 12) times - 20 (22, 24) rnds in total.
Rnd 1: NB: k until 3 sts left on the needle, k2tog, k1, NA: k until end of needle, NB: k1, ssk, k until end of rnd. 2 sts dec.
Rnd 2: NB: k until end of rnd.
28 (32, 36) sts on NB - 56 (64, 72) sts in total.
foot
Remove current beginning of round marker. K until the end of the needle (NB) and place a new marker. Work Rnd 1 until the sole of the sock is approx. 3.5 (4, 4.5) cm /approx 1.5 (1.5, 1.75)” shorter than desired.
Rnd 1: k until end of rnd.
toe
Work a set-up round once.
Set-up rnd: NA: p until end of needle, NB: k until end of rnd.
Next, work Rnds 1-2 a total of 7 (8, 9) times - 14 (16, 18) rnds in total.
Rnd 1: * k1, ssk, k until 3 sts left on the needle, k2tog, k1* twice. 4 sts dec.
Rnd 2: k until end of rnd.
Next, work Rnd 1 once more for all sizes. 24 (28, 32) sts left in total on both needles.
finishing
Graft remaining sts together, weave in ends (weave one end in the cuff and the other one
in the sole) and wet block.
I hope you enjoyed knitting your cozy socks! If you share your project on Instagram, please tag me with @whileberry.creative and #knitwithwhileberry so I can see your lovely knit!


